WECON
LX3V Serial
Supported series: Wecon LX2V/ LX2E/ LX3V/LX3VP/LX3VE/LX3VM
1)V-BOX setting
| Item | Settings | Note |
| Protocol | WECON LX2V/ LX2E/ LX3V/LX3VP/LX3VE/LX3VM | |
| Connection | RS422/RS485 | |
| Baud rate | 9600 | |
| Data bit | 7 | |
| Parity | EVEN | |
| Stop bit | 1 | |
| PLC station No. | 1 |
2)Address List
| Type | Device registers | HMI registers | Format | Range | Note |
| Bit | X | X | Xo | 0~303237 | |
| Y | Y | Y o | 0~303237 | ||
| M | M | M d | 0~99999 | ||
| T | T | T d | 0~99999 | ||
| C | C | C d | 0~99999 | ||
| S | S | S d | 0~99999 | ||
| Word | X | X | Xo | 0~303237 | |
| Y | Y | Y o | 0~303237 | ||
| M | M | M d | 0~99999 | ||
| T | T | T d | 0~99999 | ||
| C | C | C d | 0~199 | ||
| D | D | D d | 0~7999 | ||
| S | S | S d | 0~99999 | ||
| SD | SD | SD d | 8000~9999 |
3)Configure the communication protocol

4)Cable Wiring
- RS422

- RS485

LX5V Serial
This example introduces the establishment of serial port communication between V-BOX and LX5V. It is introduced through three parts: PLC software configuration, V-BOX software configuration, and hardware wiring.
Software configuration of PLC
1)PLC programming software

2)New PLC project
Click New Project and select the PLC model.

3)Set Serial port parameters
Follow the steps below to configure Serial port parameters
Baud rate:115200
Data bit:8
Stop bit:1
Parity:No verification

4)Registers list

V-BOX software configuration
1)V-BOX programming software

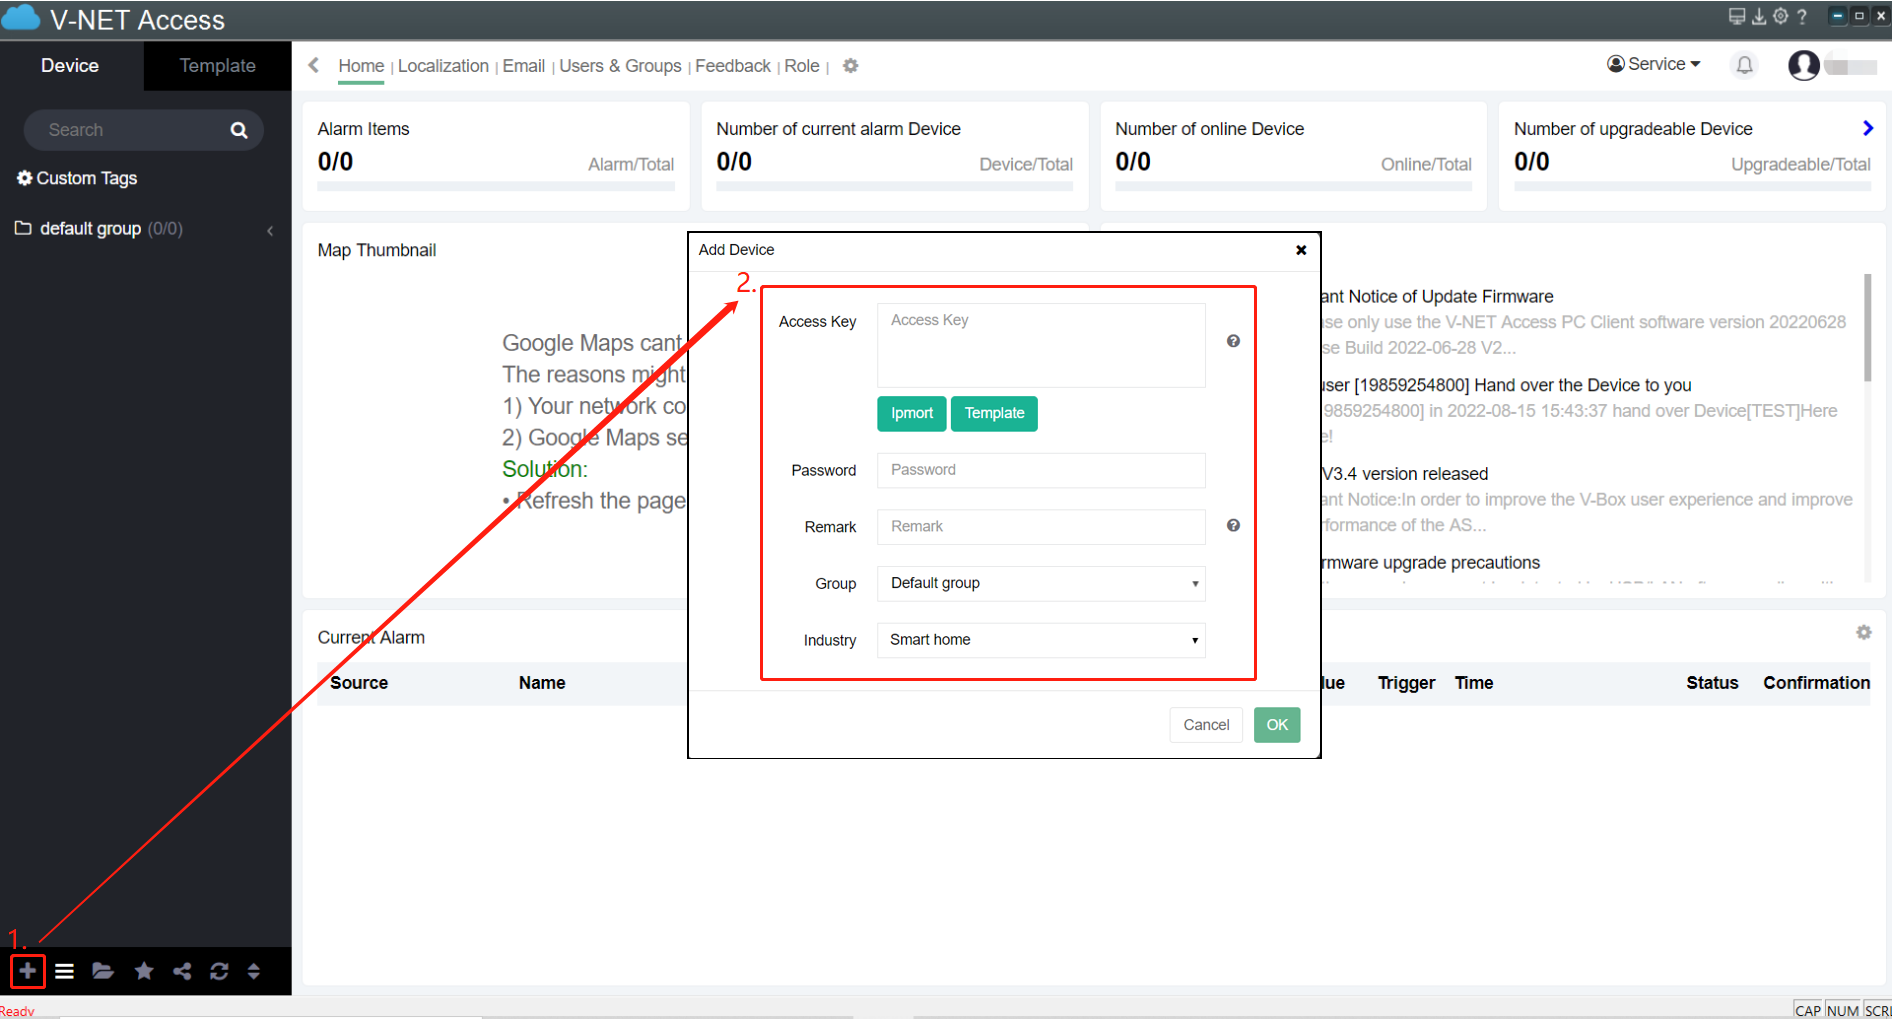
2)V-NET add device
Open V-NET client software → add device. As shown in the figure below, click "+" in the order of steps, and the Add Device window will pop up, enter the access key, password and remark, to add the device.
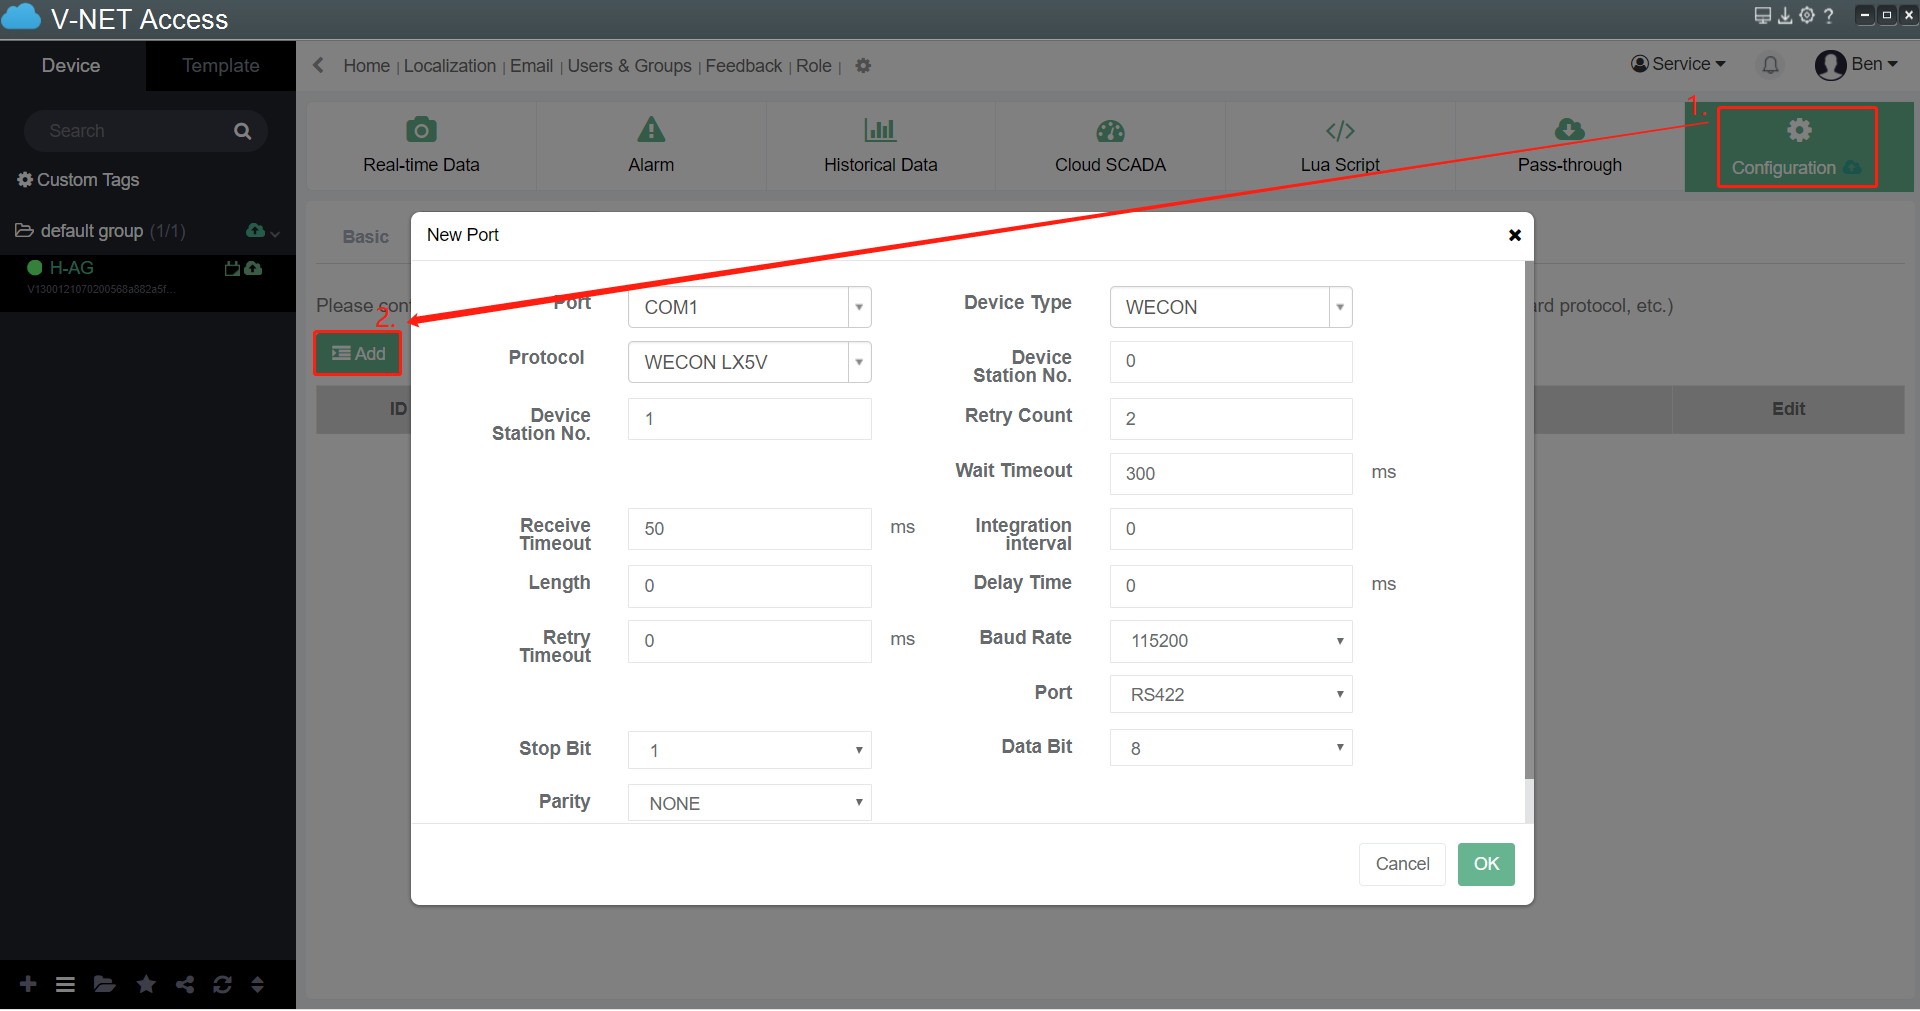
3)Set communication port parameters
Click the communication configuration button on the left to find the communication protocol with LX5V. After selecting the protocol, configure the communication parameters of the COM port.
Baud rate:115200
Data bit:8
Stop bit:1
Parity:No verification
hardware connection
1)Hardware wiring diagram


The above are all the steps for establishing serial port communication between V-BOX with LX5V PLC.
LX5V-N Ethernet
This example introduces the establishment of Ethernet communication between V-BOX and LX5V-N. It is introduced through three parts: PLC software configuration, V-BOX software configuration, and hardware wiring.
Software configuration of PLC
1)PLC programming software
2)New PLC project
Click New Project and select the PLC model.

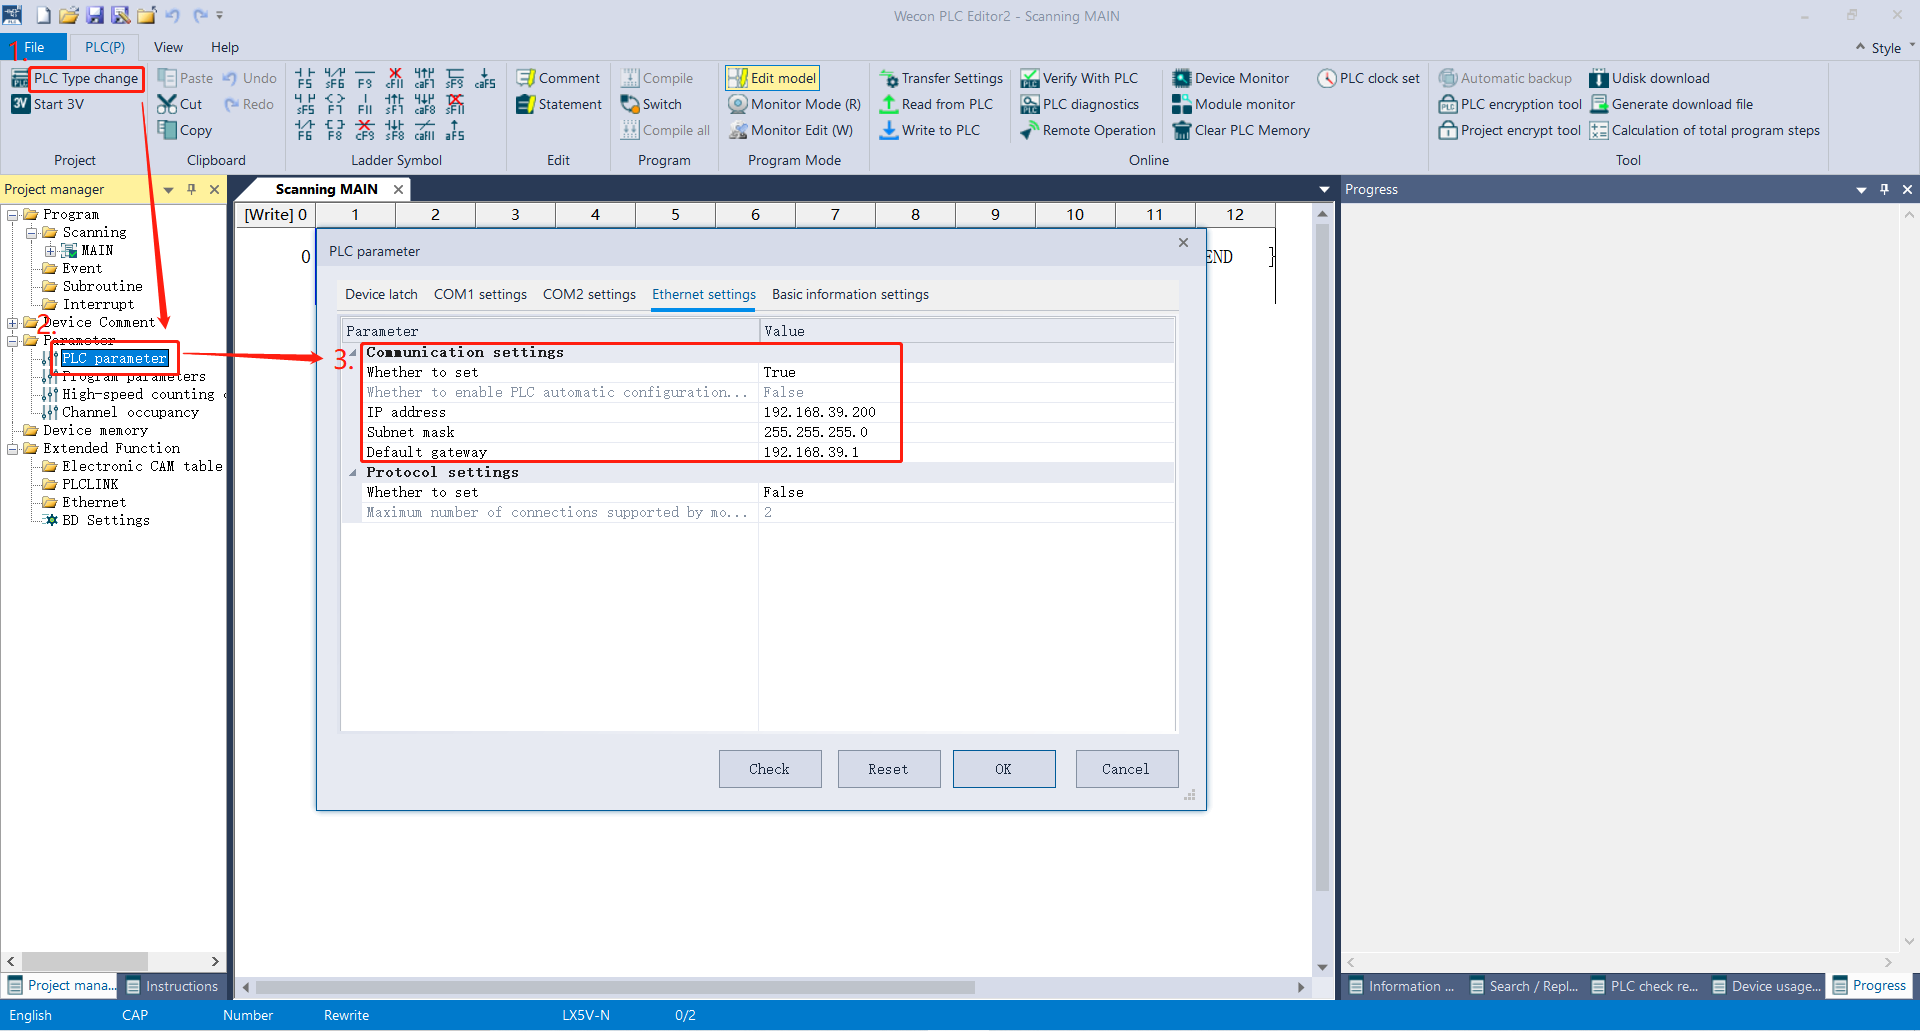
3)Set Ethernet port parameters
Follow the steps below to configure Ethernet parameters
PLC IP address:192.168.39.200
default gateway:192.168.39.1
subnet mask:255.255.255.0
4)Registers list
V-BOX software configuration
1)V-BOX programming software
2)V-NET add device
Open V-NET client software → add device. As shown in the figure below, click "+" in the order of steps, and the Add Device window will pop up, enter the access key, password and remark, to add the device.
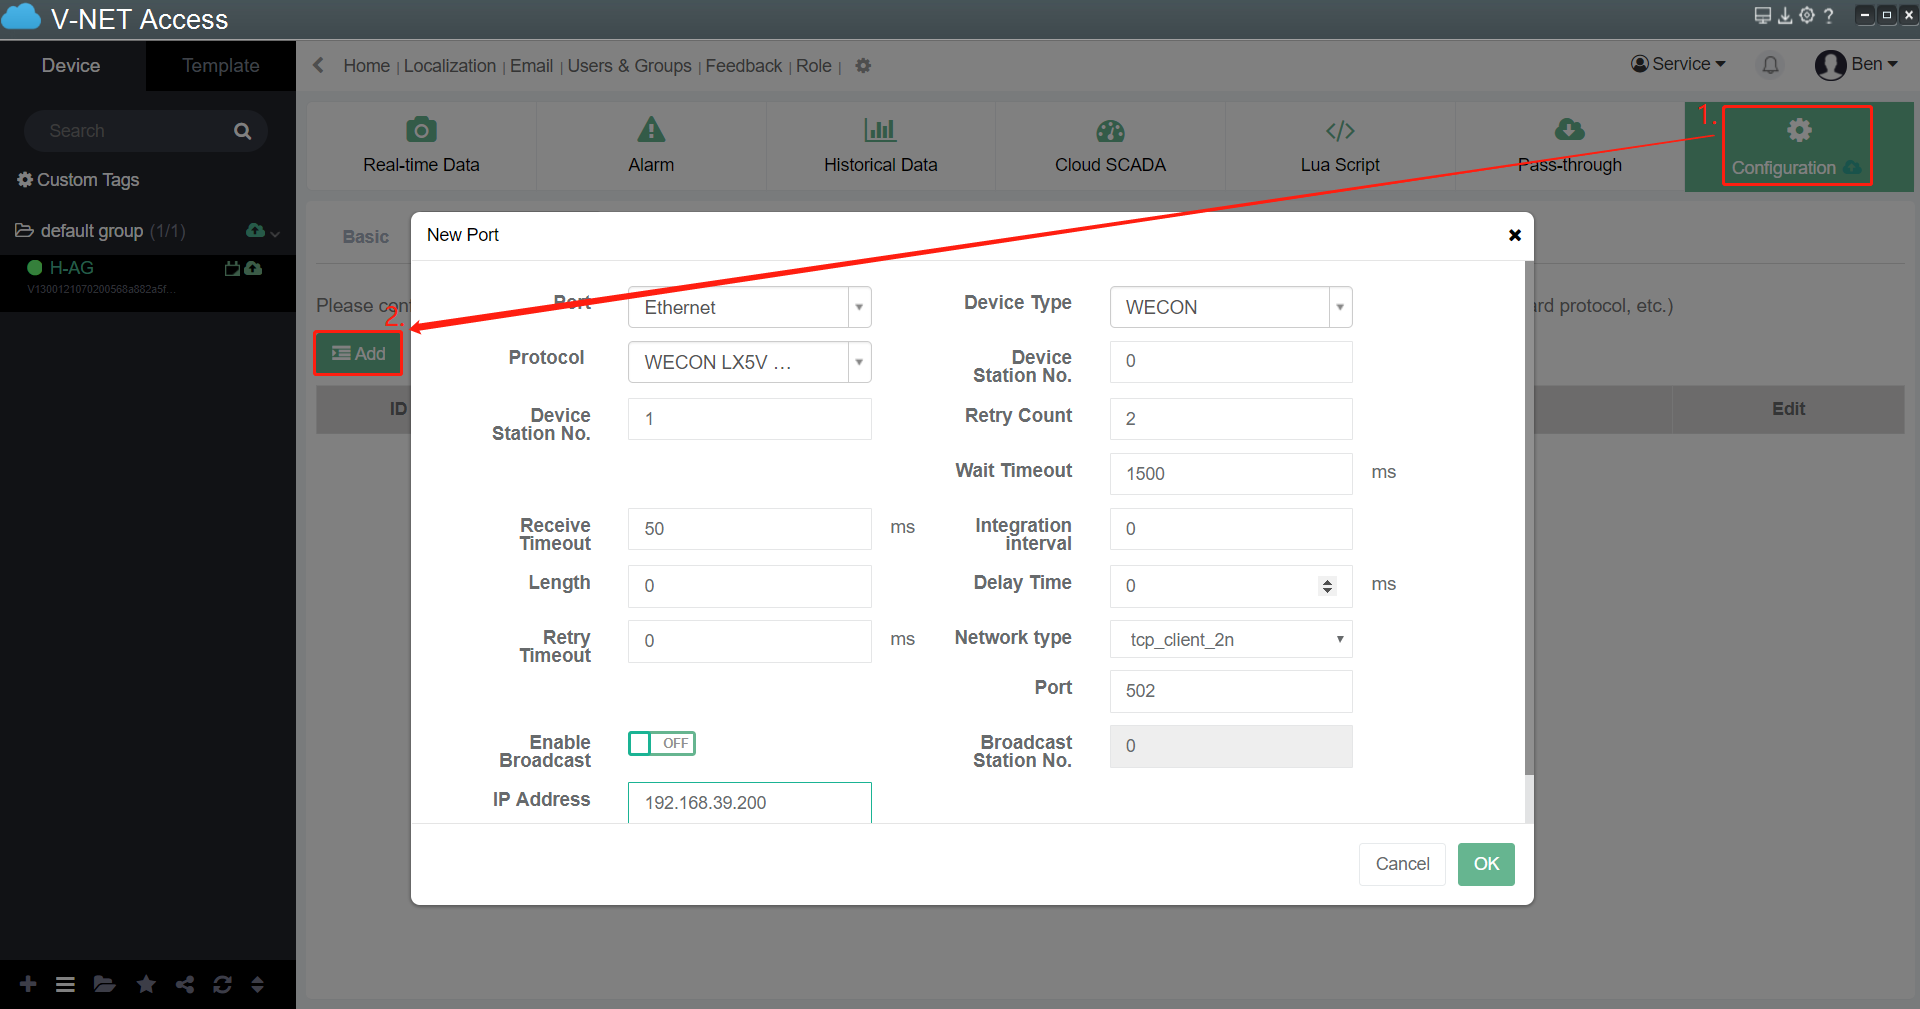
3)Set communication Protocol
Click Communication to configure the LX5V plc protocol and IP address.
hardware connection
1)Hardware wiring diagram
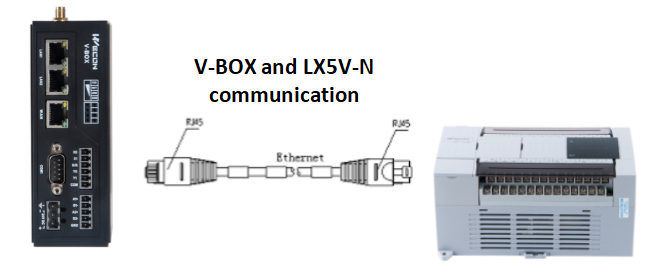
The above are all the steps for establishing ethernet communication between V-BOX with LX5V PLC.