OPC UA
OPC UA Client
This document describes the communication between Wecon HMI PI8150ig and LX6C-0808MT-DB Ethernet OPC UA, the PLC as Server and the HMI as Client.
OPC UA Server Setting
1)Add [Symbol Configuration]

2)The option [Support OPC UA features] is enabled by default, do not change it, and then click [Add];

3)Click [Build] to compile the project;

4)Tick the boxes for POU node to make all variables are accessible from OPC clients;

HMI Settings
| Items | Settings | Note |
|---|---|---|
| Protocol | OPC_UA_Client | |
| Connection | Ethernet | |
| Port No. | 4840 | |
| PLC station No. | 1 |
1)[New]→[setting]→[communication device]:[communication]Ethernet, [Protocol]Ethernet1, [Device type]OPCUA,[Protocol]OPC_UA_Client→[OK]
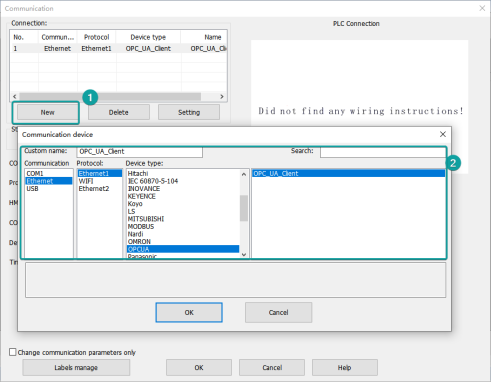
2)Set the [Device IP] as Server IP:[Server IP]192.168.8.8,[Porta]4840.If you set the account of server,you need enter the [Username] and [Password] in the appropriate places.

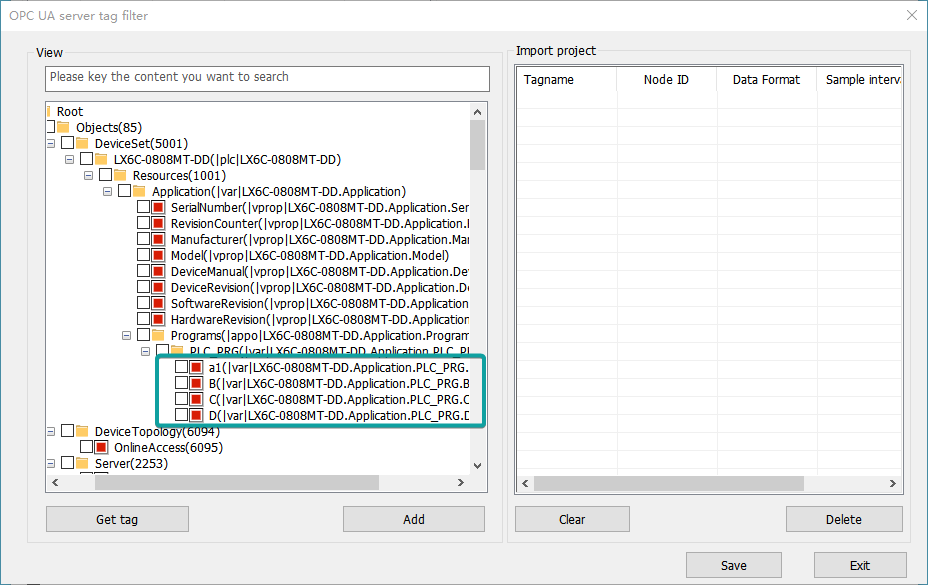
3)Enter [Labels manage],click[Get Tags From Device]

Choose the tags we need:[Root]-[Objects]-[DeviceSet]-[LX6C-0808MT-DD]-[Resources]-[Application]-[Programs].Then click[Add],and[Save].
4)Then you can use these tags in the HMI.

OPC UA Server
HMI Settings
1) [FUNCTION CONFIGURATION] →[OPC UA server] →Enable OPC UA Server

2) After enabling the OPC UA server, a configuration interface for the OPC UA server-related properties will pop up.

Description: Enter a description or remarks about the OPC
OPC TCP: Set the server's URL address
Port: Set the port number for client interaction, default is 4840
Server Name: Enter the name of the server, which can be left blank
Security Strategy: This refers to the security policies provided by OPC UA. The OPC UA server offers four security policies and three authentication methods, allowing different encryption approaches through various combinations
3) Authentication:

Anonymous: Select the permissions for client interaction when using anonymous login, including three types: browse, read, and write
Username_Password: The username and password here are equivalent to those set on the [Project Configuration\User Permission] page. When a client logs into the server using a username and password, if the user’s group level matches the server configuration, they will have the corresponding permissions
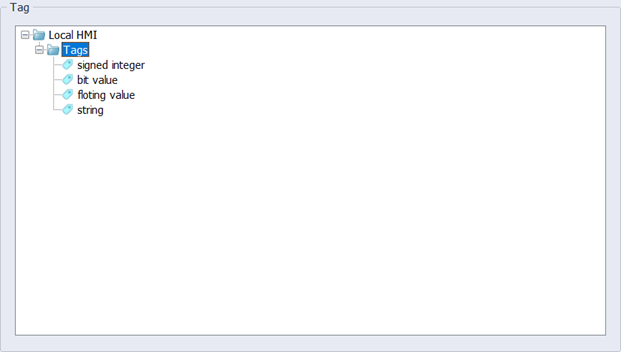
4) Tag configuration

Tag: Displays the defined tags
Add Group: Add a new group to manage tags
Add Tag: Add the address tags you want to monitor; the name cannot be empty
Setting: When a tag is selected, clicking this will navigate to the tag configuration interface. When a group is selected, clicking this will configure the group name
Delete: Can delete added tags or groups
Name: Tag Name
Type: Indicates the Readable/Writable attributes of the tag, with "Readable" selected by default
Address: Configures the address the tag is intended to monitor
Data Type: Indicates the data type of the tag
Array Length: When set to a value greater than 1, it indicates that the tag is an array, with a valid range of 1~255