01 Getting Started
PIStudio (HMI configuration software) Help can help you master the basic operation and usage of the configuration software more quickly, and assist you in completing your work successfully.
The following steps will show how to install PISudio.
Requirement
PISudio installation package downloaded.
- Windows 7 (32bit / 64bit)
- Windows 8 (32bit / 64bit)
- Windows 8.1 (32bit / 64bit)
- Windows 10 (32bit / 64bit)
Download
Installation
Steps:
- Decompress downloaded file get PISudio installation package.
- Select PISudio installation package.
- Right-click it.
- Select "Run as administrator".
- Select language for PISudio, it supports Chinese (Simplified), Chinese (Traditional), English, Italian, Russian.

- Click "Next".

- If there is a previous version of PISudio on the PC, please remove it before installation.
- Select a folder for PISudio installation, or use the default folder, then click "Next".

- Click "Browse..." to specify a folder, or use the folder suggested by the program, click "Next" to continue the installation process.
- Select additional tasks, for example: "Create a desktop icon". Click "Next".

- At this stage, all settings have been completed. Please check if it is correct. If there is any need to re-select the part, please press "Back". If all is correct, please press "Install" to start the installation process.

- Installer execution

- Please check "Launch VC Runtime" to install "Microsoft Visual C++2008" in your PC.

Result: Users could see shortcuts to PISudio's features in the "Start" » "All Programs" » “PISudio” directory.
PISuite (Toolkit)
In addition to being editable on PIStudio, HMI has other related components that can be used.
Open the "Start" ->"All Programs" ->HMI Editor installation directory to quickly open functional tool.


The tools of toolkit are as follows.
| Tool | Icon | Function |
|---|---|---|
| Download |  | Get information about HMI such as upload and download project, updata HMI's time, get HMI version, get machine colde etc,. |
| Decompile |  | After reading the project from HMI to PC, you need to decomcompile the project before opening it with PIStudio. |
| DataLogTool |  | To view the "DB" such as file data records, alarm records or operation records collected by HMI. You could also convert it to "excel" format. |
| LogoMakerTool |  | To make the boot logo of PI series HMI. |
| DataUpload |  | Upload data record ,alarm records or operation records collected by HMI. |
| PIRecordUpload |  | Monitor devices in real time, update and export data records, alarm records or operation records collected by HMI synchronously. (Only supported by ig Sseries) |
| CreatInstallmentPwd |  | The installment payment mode is dynamic password. You can use the Installment password tool "CreatInstallmentPwd" to generate the dynamic password. |
| PIMonitor |  | LAN monitoring of 3000 series HMI screen. |
| Levi2PI |  | Convert LEVI series engineering to PI series engineering. |
| HMIPrjStdNeutral |  | Project conversion between PI standard and PI neutral version |
| PIRptEditTool |  | Convert the record files generated by LEVI or PI to the specified format. |
| HMIProjectReportTool |  | Analyze and generate HMI engineering report. |
Getting Started
This chapter provides a quick and precise introduction of PISudio.
It does not contain a comprehensive list of all functions, but it only takes 6 simple steps to create a new project.
| Operation | Description |
|---|---|
Click the "New" in the upper left corner of the software to create a new project. You could click "New screen" to create a new screen. See the "Screen Style (only for ig series)" for details. | |
Click "Communication" and "Project settings" to set communication protocol and port parameters. | |
| Create screens and place the objects you need. You could draw your own project through "draw", import the required pictures and vector maps using "Shape" library, and enrich the project as much as possible by using the diversified objects. |
| You need to "compile" every project before downloading to it HMI. When uploading a project from the HMI to the PC, you need "Decompile". |
HMIEditorP provides two simulation modes: offline simulation and online simulation.
| |
| Downloading is the last step. After completing the download, the HMI can run the designed project, and the project downloaded to the HMI can also be uploaded to the PC. |


Create new project
The following steps will show how to start PIStudio and create a project.
Requirement
PIStudio programming software is installed.
Operating Procedure
- Start PISudio software by clicking icon, or from Start Menu.
- Find " PISudio" folder.
- Click " PISudio" icon to start software.

- Click "New project".

- Configure project name, project path.
- Select HMI model and communication protocol.
- Click "OK" to save setting.

Result
- User could find a folder named HMIProject on the desktop.
- In the folder user could find a file with a suffix named ".pi". Double click the file to open the project.
Add screen
The following steps will show how to create and rename screens in HMIEditorP.
New screens, which are still blank, could be created using the "Common object". User could choose different objects to design screen according to project's requirements.
Requirement
The "Quick_Start" project is open.
Steps:
- Create a new process screen: Clicking "New" will appear "New screen" setting.

- Set screen parameter in "New Screen", such as screen number, screen name, background type.

- After making a new screen, user could insert objects in screen. For example, button and trend.
- Add button object in screen.
- Set button object parameters, such as read address, mode, etc.

- Add "Trend Chart" from "Chart".

- And "Function key" for screens switch.
Result
Do a project screen with a bit button, one chart display object, and one Function key for switching screen.
Project size limits
- 3000 series limits the project file size to 25M
- 3070i series limit the project file size to 25M
- 3070ie series limit the project file size to 22M
- 3070ig series limit the project file size to 25M
- 8000&9000 series limit the project file size to 165M
Create communication with WECON PLC
11 PLC Protocol - Wecon (we-con.com.cn)
Upgrade from old(LEVI) project
General
This document mainly introduces how to use the conversion tool Levi2PI. Its function is converting the project from Levi to PI.
Operation steps
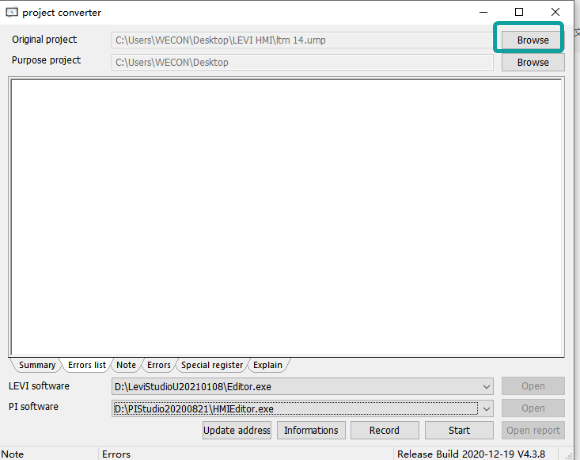
Select source project
Select the .ump file of Levi project.
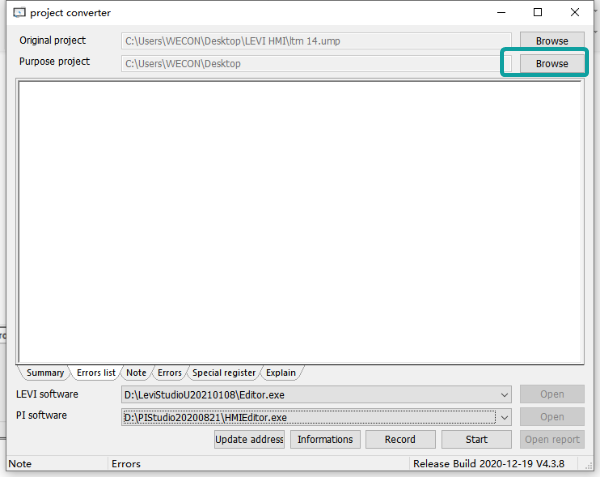
Select destination
Select the saved path of converted project.
Convert
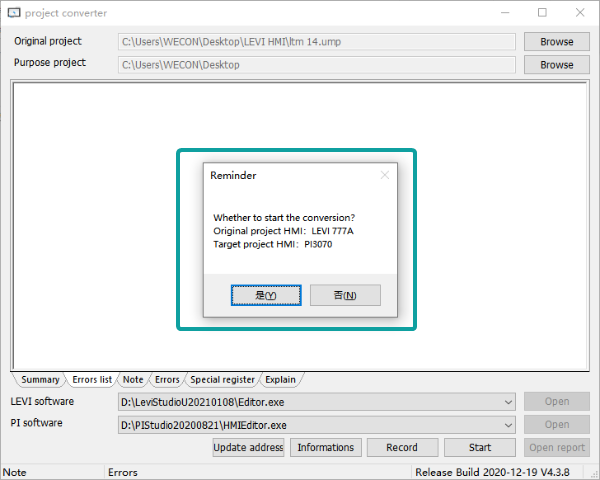
Click the "Start" to start conversion.
It will pop up a reminder to confirm the model to be converted.At present we don't support changing model at this process. Please change that in PIStudio after conversion done. Click “Yes” to continue.
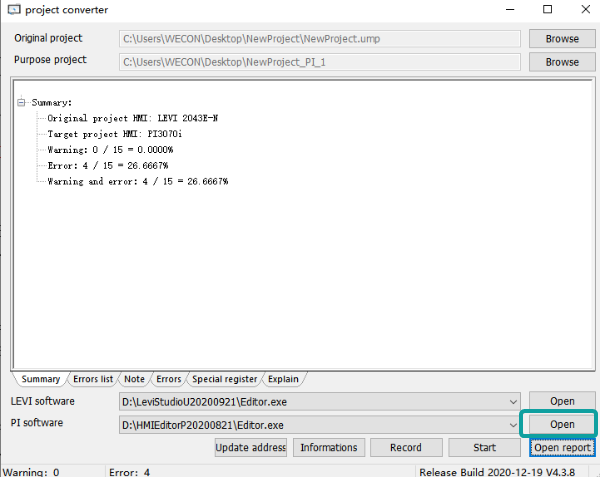
After the conversion is finished,it can click the “OPEN” button to quick open the project.
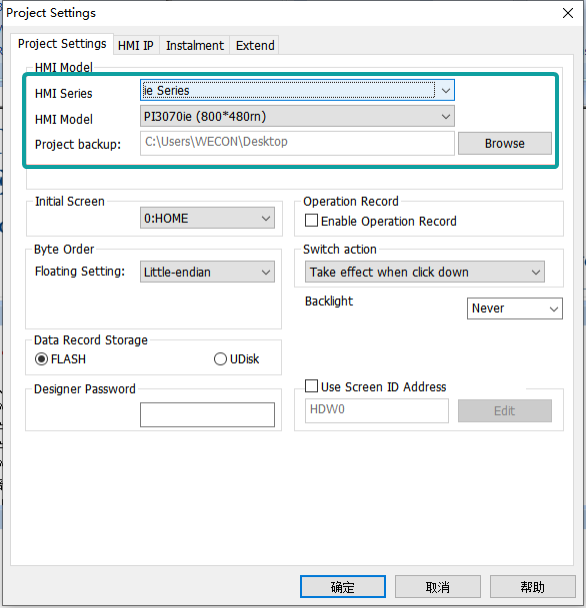
Currently most Levi models are converted into PI3000 series or PI3000i series by default.
So if you want to change the model, please remember to change it in PIStudio.
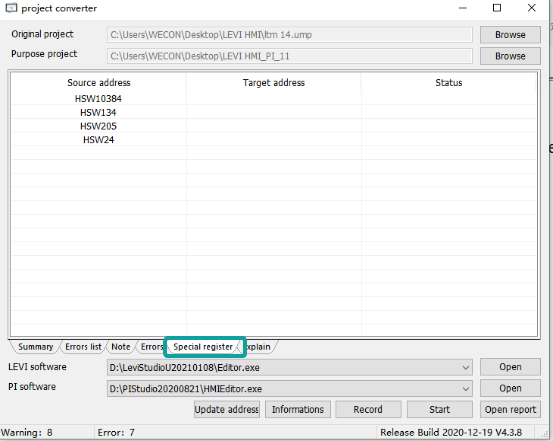
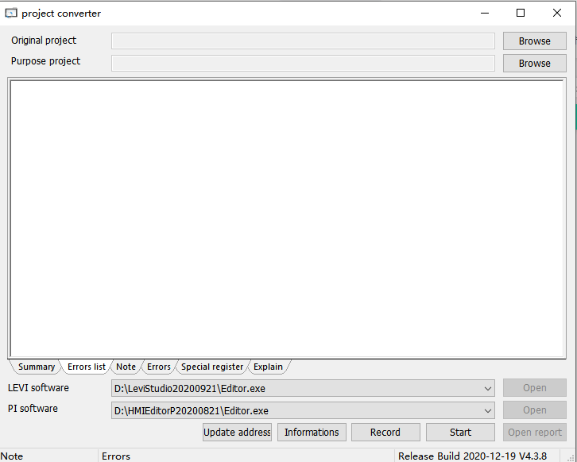
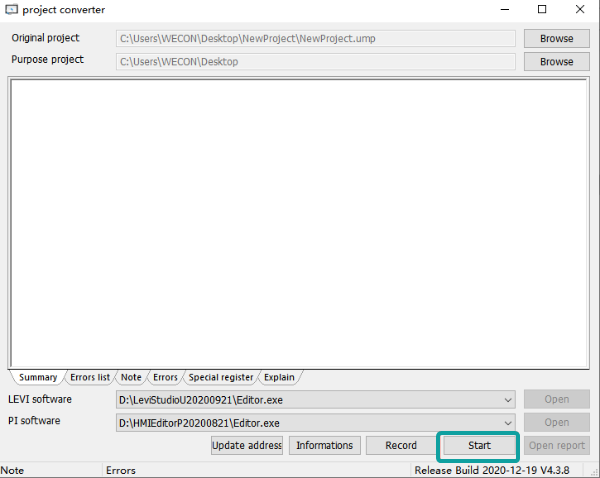
Appearance
Original project: To choose the ump file you want to convert
Purpose project: To choose the converted project saved path.
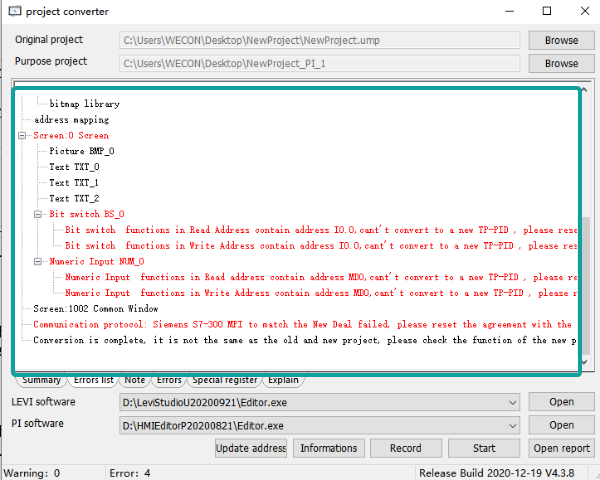
Print out the info of conversion.
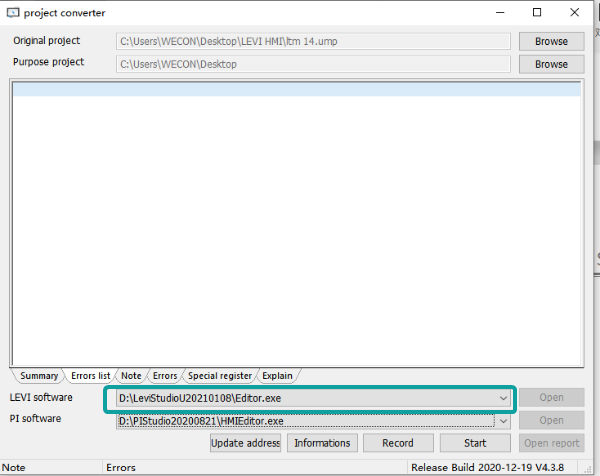
LEVI software: To choose the LeviStudioU or HMIEditorU Editor.exe file for original project.
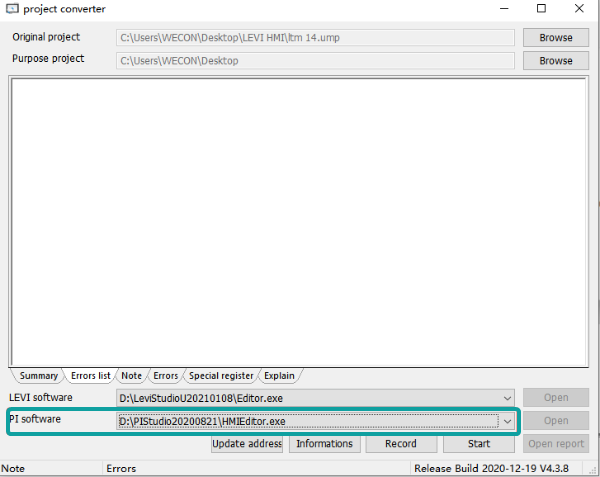
PI software: To choose the PIstudio or HMIstudioP Editor.exe file for conversion.
Informations: To view original project's basic info.

Records: To view historical convert records.
Start: To start the conversion.
Open report: To get the convert report(A HTML format file).

Update address: It is refer to the tab "Special register". It is for replacement function of the special register without corresponding relationship between PI and Levi.